Emote Building Source Remote Remote Could Not Complete the Action Please Try Again Later
A step past pace guide to build a Windows Server 2019 Remote Desktop Services deployment.
I posted this before based on Windows Server 2012 R2 RDS and thought information technology was high time to update this post to a more modernistic Bone version.
I will provide all the steps necessary for deploying a single server solution using the GUI tools.
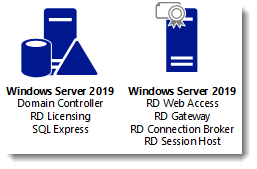
Although it is chosen a unmarried server installation, we will need two servers every bit shown below.
Software used in this guide:
Windows Server 2019 ISO (evaluation tin be downloaded hither: https://www.microsoft.com/en-united states of america/evalcenter/evaluate-windows-server-2019).
SQL Server 2017 Express x64 (free version can be downloaded here: https://www.microsoft.com/en-usa/download/details.aspx?id=55994).
SQL Server 2016 Native Customer (free version tin exist downloaded here: https://www.microsoft.com/en-united states of america/download/details.aspx?id=52676. After clicking the download button select ENU\x64\sqlncli.msi). Although I'one thousand installing SQL Express 2017, there are no newer client tools available.
SQL Server Direction Studio (free, and tin be downloaded here: https://docs.microsoft.com/en-us/sql/ssms/download-sql-server-management-studio-ssms).
And a document. I got mine for free from https://www.sslforfree.com/. This certificate needs to contain the FQDN you lot will apply equally the RD Spider web Access URL (mine is rds.it-worxx.nl in this guide). It needs to be in .pfx format and you need to have the individual primal in it.
This guide will non focus on building a domain using a single domain controller and adding the 2d server as a member server to this domain.
Also some basic knowledge is assumed in this guide. I will not item how to create a Security Group and adding a calculator account to it. I will besides non detail how to install SQL Express, or adding logins to a SQL Server Case security context. If you need extra assistance with this, Bing information technology or drop me a mail with details, and I volition provide steps to continue.
I volition be using Hyper-V on my Windows 10 1809 laptop and I have prepared 2 servers:
ITWDC (one vCPU, 1024MB memory, dynamic, 60GB Harddisk)
Installed Windows
IPv4 192.168.0.4/24
Added .NET Framework 3.5 equally a feature
Added Active Directory Domain Services as a role
Configured this server every bit a Domain Controller in a new forest: it-worxx.lab
ITWRDS (ane vCPU, 1024MB memory, dynamic, 60GB Harddisk)
Installed Windows
Added .Internet Framework three.v as a feature
IPv4 192.168.0.10/24, DNS server 192.168.0.iv
Configured it as a fellow member server in the information technology-worxx.lab domain
Installing the Remote Desktop Services Roles
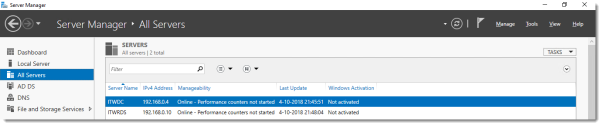
Log on to the Domain Controller, and in Server Manager correct-click the All Servers node and add the second server using the Add Servers control (or select the All Servers node, click Manage and click Add together Servers).
Now that all servers needed in this deployment scenario are present, click Manage, and click Add Roles & Features.
Earlier you brainstorm
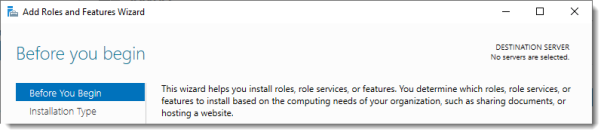
Click Next.
Select Installation Blazon
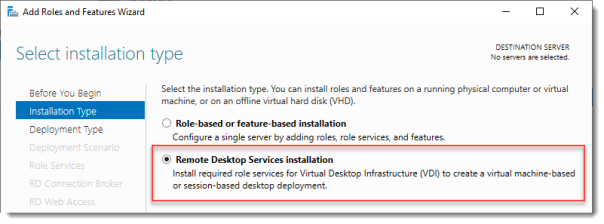
Select Remote Desktop Services installation.
Click Next.
Select Deployment Blazon

Although Quick Start might be a valid pick for a single server deployment, leave the default selected. This will explain the steps necessary to install Remote Desktop Services in greater particular.
Click Next.
Select Deployment Scenario
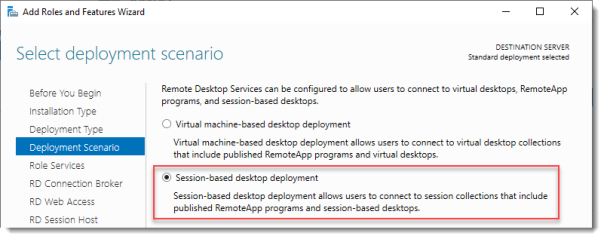
Select Session-based desktop deployment.
Click Side by side.
Review Role Services

Review the services that volition be installed.
Click Adjacent.
Specify RD Connection Broker server
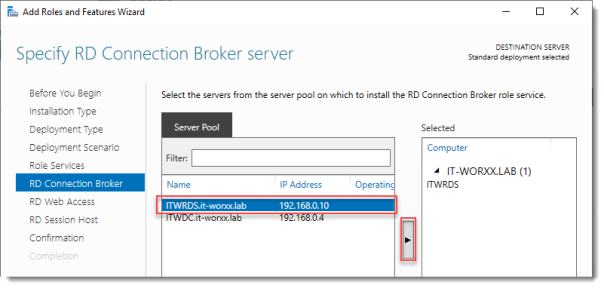
Click the member server and click the Add push.
Click Adjacent.
Specify RD Web Access server
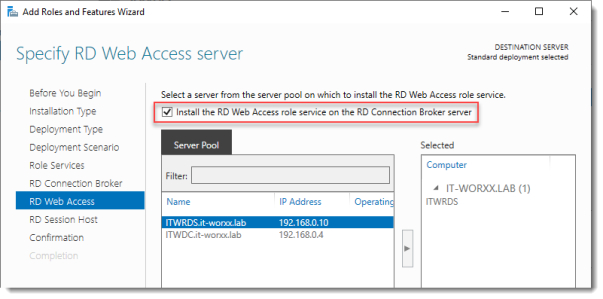
Check Install the RD Spider web Access part on the RD Connection Broker server.
Click Next.
Specify RD Session Host server
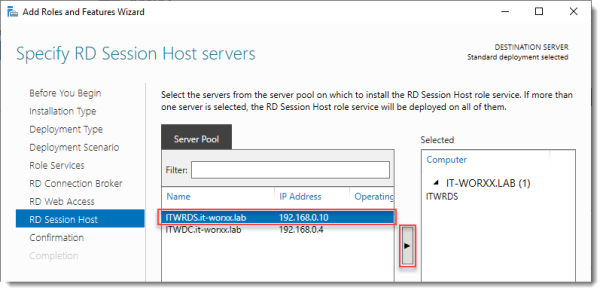
Click the member server and click the Add button.
Click Next.
Ostend selections
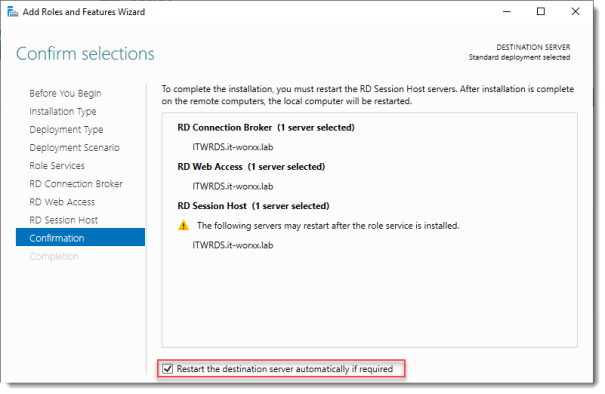
Bank check Restart the destination server automatically if required.
Click Deploy.
View progress
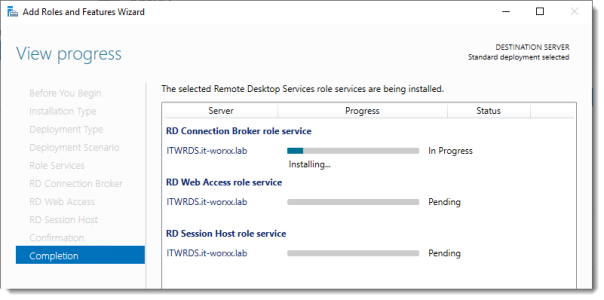
Wait until all role services are deployed and the member server has restarted.
Click Close.
In Server Manager click Remote Desktop Services and coil down to the overview.
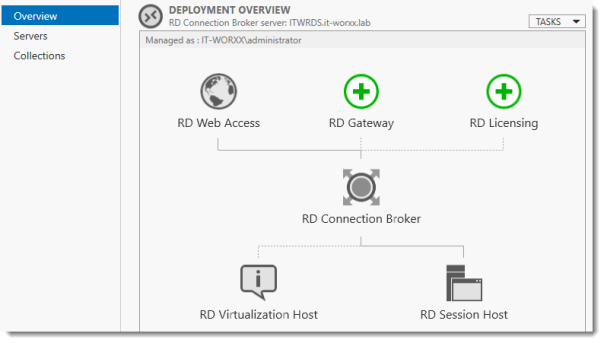
As you can encounter the deployment is missing a RD Gateway server and a RD Licensing server.
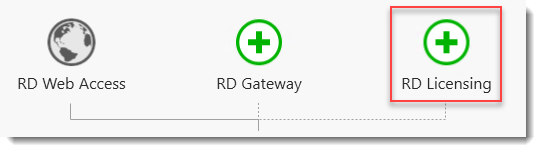
Click the Add RD Licensing server push button.
Select a server
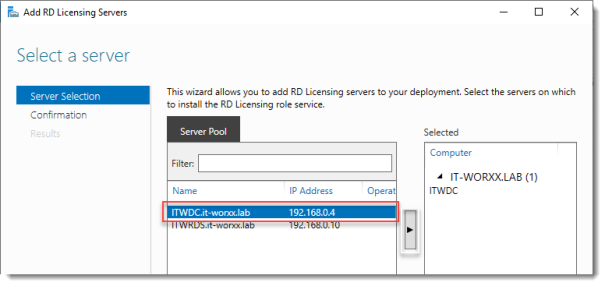
Click the domain controller and click the Add push.
Click Next.
Confirm selections
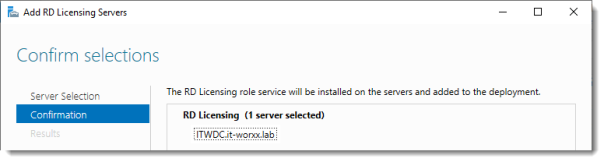
Click Add.
View progress
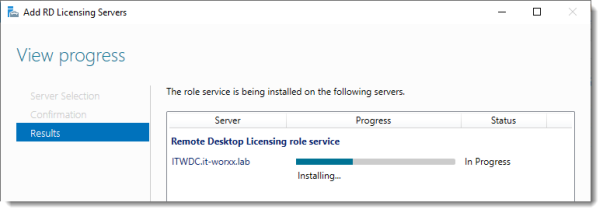
Await until the function service is deployed. No restart is needed.
Click Close.
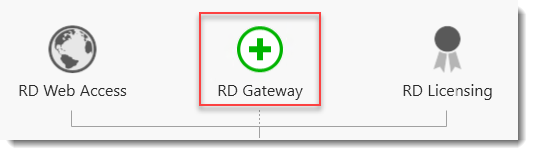
Click the Add together RD Gateway server push.
Select a server
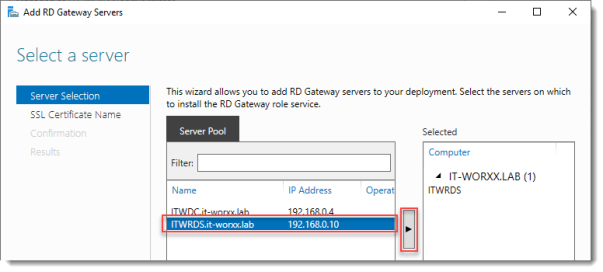
Click the member server and click the Add button.
Click Next.
Proper name the self-signed SSL certificate
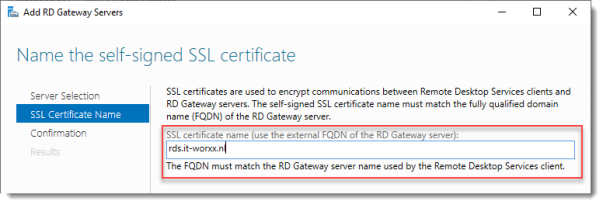
The sorcerer creates a self-signed document. We will deal with certificates in this deployment in a little scrap. We will replace the self-signed certificate.
Enter the external Fully Qualified Domain Proper name which you lot will likewise use for the Web Access URL. In my instance, for lack of a meliorate name, I used "rds.it-worxx.nl". I didn't want to use "remote.it-worxx.nl" or "desktop.it-worxx.nl" or anything else.
Click Adjacent.
Ostend selections
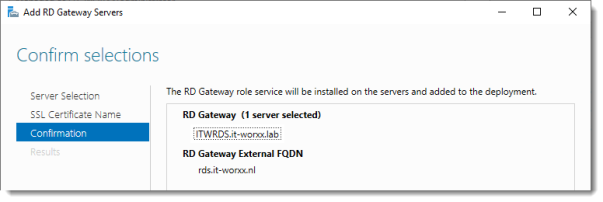
Click Add together.
View progress
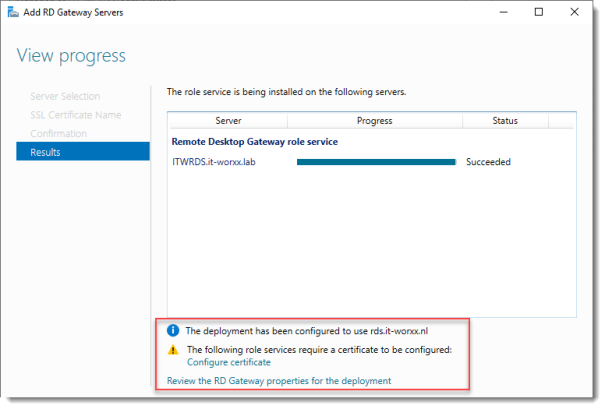
Wait until the role service is deployed. Again, no restart is needed.
Notice that "rds.it-worxx.nl" was configured for the deployment.
Also observe that even more than certificate configuring is needed, only nosotros'll go to that later. Pay no attention to it for now. The same goes for the RD Gateway properties for the deployment. We'll get to that later.
Click Close.
Review role installation and setting License Mode
Allow's accept a quick look at the configuration we have so far.
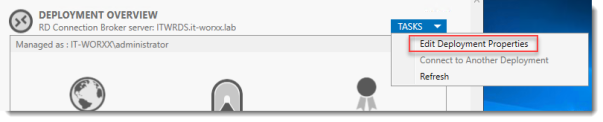
In Server Manager, Remote Desktop Services, Overview, click Tasks and click Edit Deployment Properties.
Configure the deployment
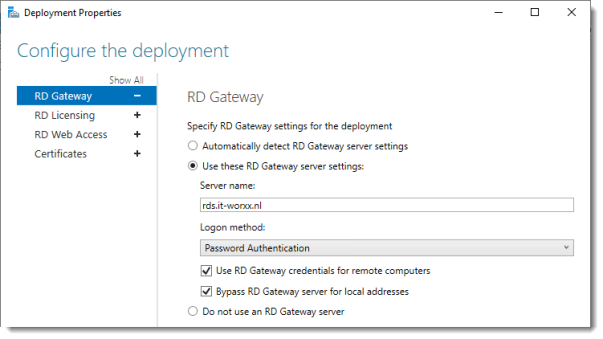
Review the RD Gateway settings and detect what settings are bachelor.
Click RD Licensing.
Configure the deployment
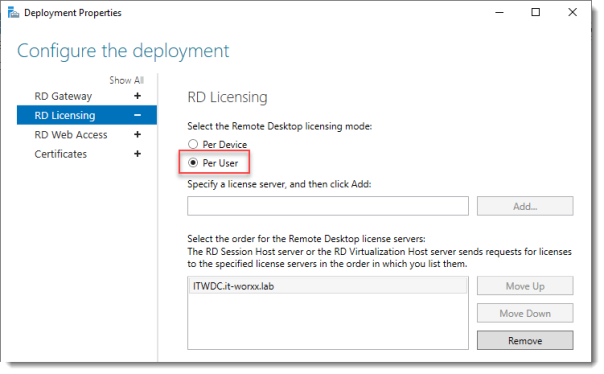
Notice that an RD License server is available, simply no license type is selected withal.
I selected Per User, merely since this is merely a guide setup, it really doesn't matter.
Click RD Web Access.
Configure the deployment
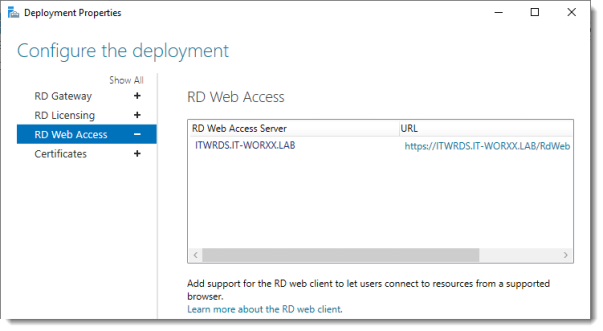
By default the RD Web Admission IIS application is installed in /RdWeb.
If y'all want to know how to change this, check another mail: https://msfreaks.wordpress.com/2013/12/07/redirect-to-the-remote-spider web-access-pages-rdweb/
This is for Windows Server 2012 R2 RDS, but it also works for Windows Server 2019 RDS.
Click Certificates.
Configure the deployment
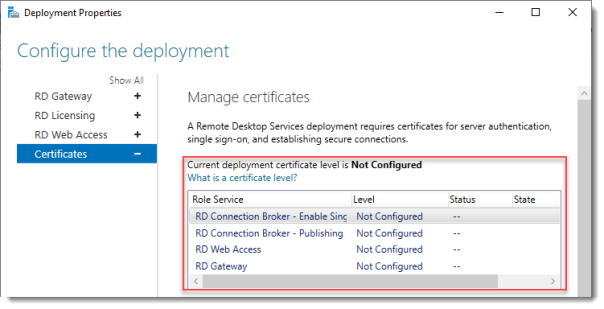
Find that the certificate level currently has a status of Not Configured.
As y'all can see, certificates are used for different goals within the deployment.
The RD Gateway certificate is used for Customer to gateway communication and needs to be trusted by the clients. Either install the self-signed certificate on all clients, or use a certificate for which the complete document concatenation is already trusted by all clients. As it said in the wizard, the external FQDN should exist on the document.
The RD Web Admission certificate is used past IIS to provide a server identity to the browser clients.
The RD Connection Broker actually has two goals for which information technology needs certificates. To enable single sign on (server to server authentication), and for publishing (signing RDP files). If you look in the deployment you'll encounter that the Connection Broker is at present configured to use "itwrds.it-worxx.lab", so nosotros have to alter it to utilize an external FQDN also.
If nosotros use the same FQDN for all goals described to a higher place, we need just one document, and but 1 external IP address.
Nosotros'll come back to this wizard later to assign the certificate. Offset order of business concern is to modify the internal FQDN for the Connection Broker to an external FQDN.
Click OK (no reason why we shouldn't commit the change we made on the licensing tab, remember?)
Changing the Connexion Broker FQDN to an externally resolvable FQDN
Open DNS Manager on the domain controller and browse to Forrard Lookup Zones.
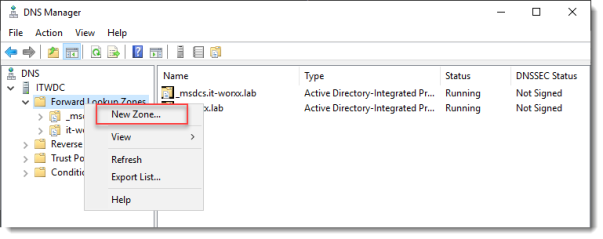
Right click Frontwards Lookup Zones and click New Zone… Go through this wizard accepting the defaults until you have to enter a Zone Proper noun.
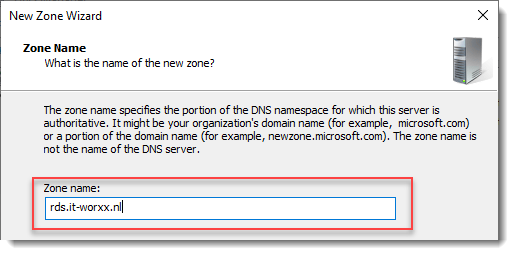
Enter the external FQDN which will besides be used by the Connection Broker.
Finish the residuum of the magician accepting the defaults.
Browse to the newly created zone.
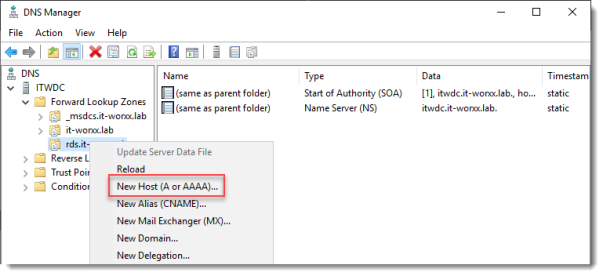
Right click the newly created zone and click New Host (A or AAAA)…
New Host
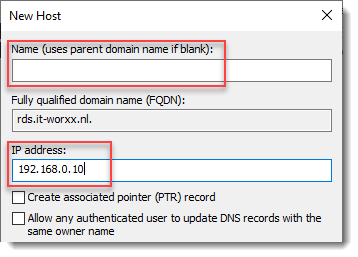
Exit the Name field blank, but enter the member server'southward (holding the RD Connection Banker office) IPv4 address.
Click Add together Host.
Now the configuration volition exist able to resolve "rds.it-worxx.nl" to the server holding the Connection Banker part, and this will work considering "rds.it-worxx.nl" is also on the certificate that nosotros will configure later.
Create a new Global Security Group called "RD Connection Brokers" and add the calculator account for the member server to it as a group member.
We demand this group to be able to convert the RD Connection Broker to a highly bachelor RD Connection Broker. You'll see why we need to do this in a few steps.
Reboot the member server to let it know it's a member of the RDS Connection Brokers security group.
The next steps in re-configuring the RD Connection Broker depend on an SQL database shared past all Connection Brokers in the deployment. Without this configuration the RD Connection Broker will rely on the Windows Internal Database that was created during the initial deployment of the roles.
Install SQL Express on the Domain Controller (or utilize an existing SQL Server if you already accept 1).
It'southward not best practise to install SQL onto a Domain Controller, but information technology'll do for this guide.
Here'south a list of needed features:

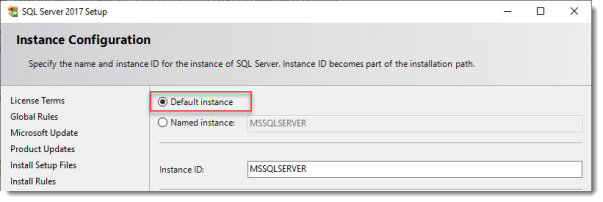
Use the Default Example (so click Default, and exercise non leave the wizard's selection on Named instance: SQLEXPRESS).
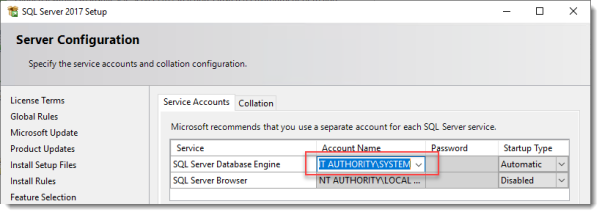
Set the SQL Service to offset using SYSTEM because the default account of SQLSERVER cannot be used on a Domain Controller.
When the installation is done open SQL Configuration manager and browse to Client Protocols nether SQL Native Client 11.0 Configuration.
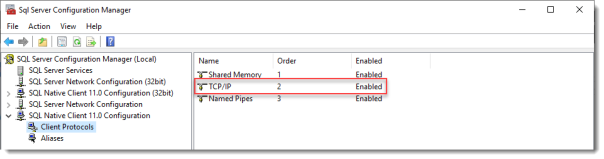
Check if TCP/IP is enabled under Client Protocols. SQL Express install enables this by default, but check it just to exist sure, especially if you apply an existing SQL Server.
Scan to Protocols for MSSQLSERVER nether SQL Server Network Configuration.
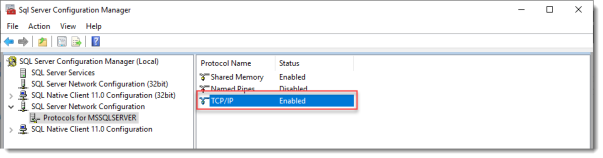
Enable TCP/IP. If this is a new SQL installation, this will be disabled by default.
Restart the SQL Server service if you inverse this setting.
On the SQL Server, make sure port 1433 is not being blocked by Windows Firewall.

I added the SQL Server executable to the exception list to allow all inbound traffic, only TCP 1433 entering should suffice.
If you installed SQL Server using the default folder locations, the sqlservr.exe executable is found in "C:\Program Files\Microsoft SQL Server\MSSQL14.MSSQLSERVER\MSSQL\Binn".
Open SQL Server Management Studio, connect to the default case on the Domain Controller and scan to Logins under Security.
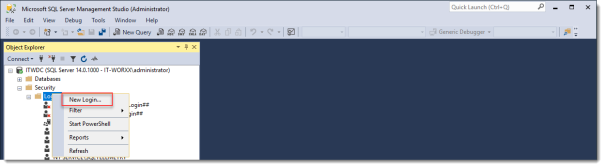
Call up the Management Studio is no longer available with the SQL Server download, just is a different download.
Correct click Logins and click New Login…
Login – New
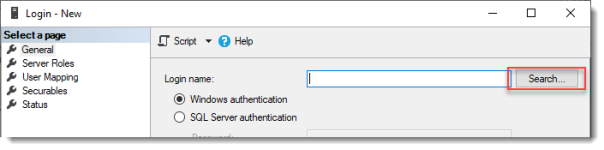
Click Search…
Select User, Service Account, or Grouping
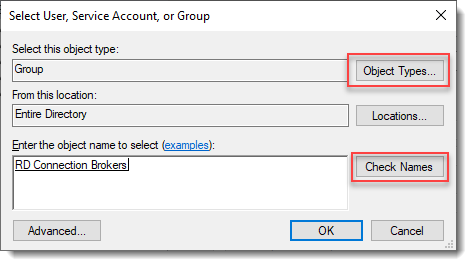
Click Object Types… and select Group.
Blazon the RDS Connection Brokers security group name and click Check Names.
Click OK.
Login – New
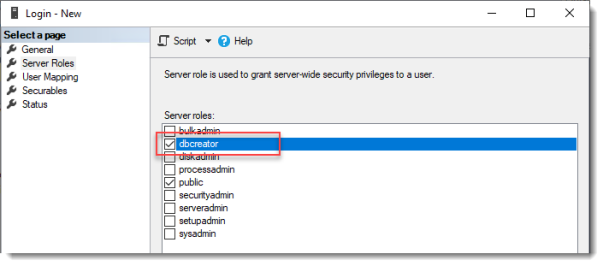
Click Server Roles and select dbcreator.
Click OK.
We have just effectively granted the RDS Connectedness Broker server the right to create databases.
We need this because the RDS Connexion Banker service will try to drift from WID (Windows Internal Database to a (high available) SQL Server case when nosotros convert the Broker to a high available broker.
Install the SQL Native Client on the member server (Client Components only). If you used the member server in this setup to install the SQL Management Studio, you can skip this stride because the Native Client was installed with installing the Management Studio.
Everything we need is in place to convert the RD Connection Broker, so permit'south do just that.
In Server Manager click Remote Desktop Services and gyre downward to the overview.
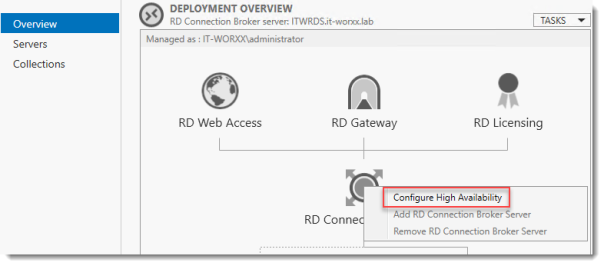
Right click RD Connexion Broker and click Configure High Availability.
Before you begin
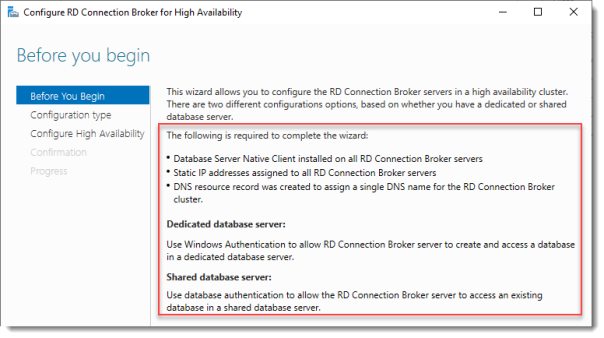
So we're building a single node cluster here ;)
Look at the pre-requisites.
If yous have more than than 1 RD Connection Broker they need to exist configured using DNS Circular Robin.
Click Next.
Configure RD Connection Broker for Loftier Availability
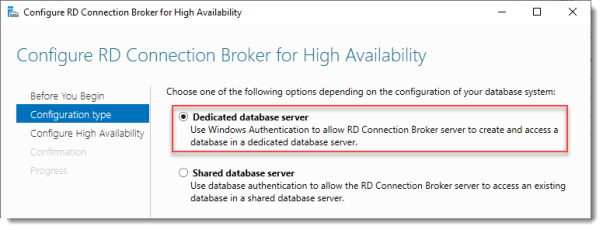
Since we just installed an SQL Server for this, go out the default selected. You'd utilise the other selection for instance if you'd like to employ Azure SQL for this deployment.
Click Next.
Configure RD Connexion Broker for High Availability
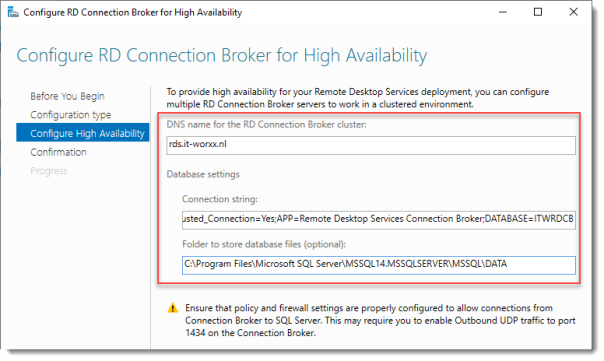
DNS name for the RD Connexion Broker cluster:
The DNS Zone name we configured in DNS before: rds.it-worxx.nl
Connectedness string:
DRIVER=SQL Server Native Customer 11.0;SERVER=ITWDC;Trusted_Connection=Yes;APP=Remote Desktop Services Connexion Broker;DATABASE=ITWRDCB
Folder to store database files:
C:\Program Files\Microsoft SQL Server\MSSQL14.MSSQLSERVER\MSSQL\Information
I used the example default folder.
Click Adjacent.
Confirmation
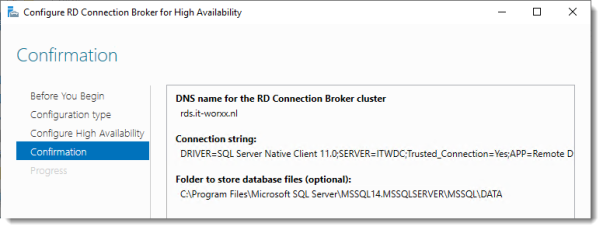
If yous get an fault before this page:
- Check if TCP/IP is enabled in client protocols and for your instance
- Check if yous can achieve port 1433 on the SQL Server from the fellow member server
Click Configure.
Progress
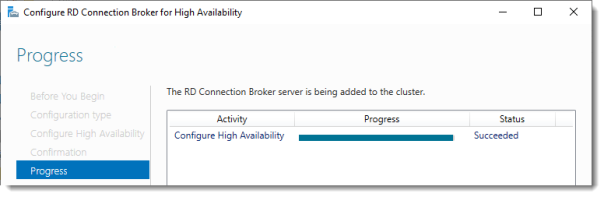
If you go an error on this page:
- Bank check SQL permissions for the security group
- Check if the database path you entered is right
Click Close.
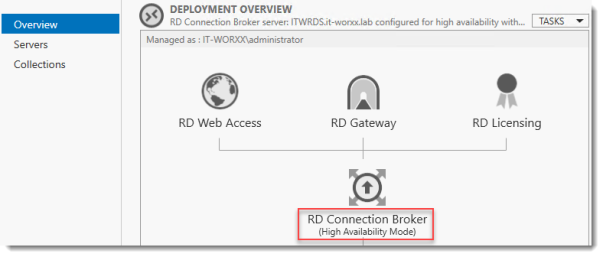
The RD Connection Banker is now in High Availability Way, and configured as "rds.information technology-worxx.nl" and we are finally ready to complete the configuration.
Configuring Certificates

In Server Manager, Remote Desktop Services, Overview, click Tasks and click Edit Deployment Backdrop, then click Certificates.
Configure the deployment

Click RD Connection Broker – Enable Unmarried Sign On and click Select Existing certificate.
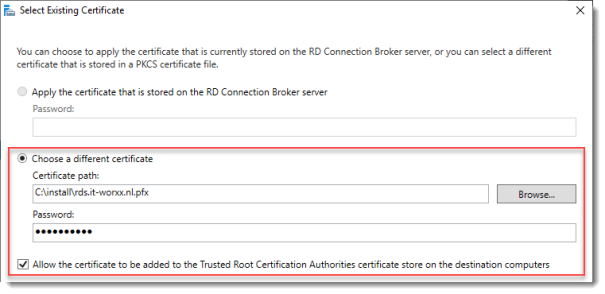
Scan to the .pfx file, enter its password, and check Allow the certificate..
Click OK.

So click Employ. This takes a fiddling while, be patient.
Configure the deployment
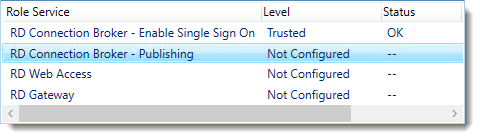
Click RD Connection Broker – Publishing and click Select Existing document.
Browse to the .pfx file, enter its countersign, and check Let the certificate..
Click OK.
Click Apply. This over again takes a little while, be a little more patient.
Configure the deployment
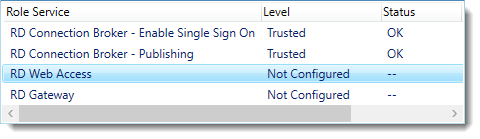
Click RD Web Access and click Select Existing document.

Note: Did yous find the alarm when you lot select RD Web Access?
Browse to the .pfx file, enter its countersign, and check Allow the certificate..
Click OK.
Click Employ once again. This takes another little while longer, be slightly more patient.
Configure the deployment
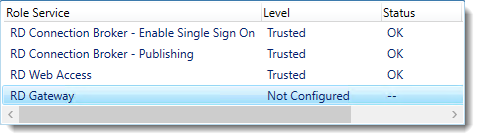
Last 1. Click RD Gateway and click Select Existing certificate.
Browse to the .pfx file, enter its countersign, and cheque Permit the certificate..
Click OK.
Click OK to utilise the final certificate stride.
Configured all servers, configured certificates..
1 thing left to do: Tell our RDS environment exactly what to publish.
Publishing resources to your users
In fact you can use this setup to either provide full desktop sessions on the Session Host, or you tin choose to publish only applications on the Session Host.
Permit's publish full desktop sessions.

In Server Director, Remote Desktop Services, Session Collections, click Tasks and click Create Session Collection.
Before you begin

Review the requirements. This won't be an consequence in this setup, but you could restrict access to this collection past selecting a select group of people.
Click Next.
Proper noun the collection
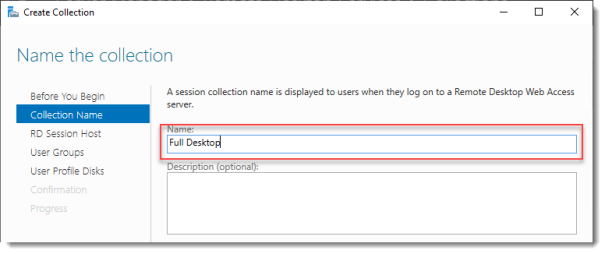
Enter a descriptive name. This name will be displayed under its icon in the Web Access interface.
Click Adjacent.
Specify RD Session Host servers

Click the member server and click the Add together push.
Click Next.
Specify user groups
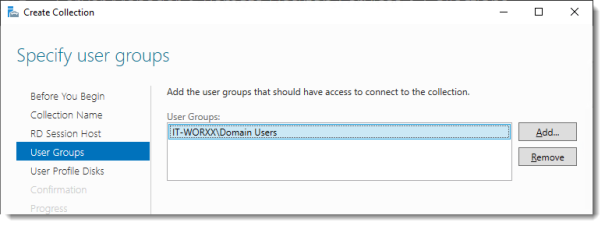
You lot can limit access to the resource here if y'all want. Add ane or more groups to restrict access to these groups only. In this setup the default option of Domain Users will do fine. Groups you specify here will be added to the listing of groups of users that are allowed to connect using RDP to the Session Host server(s).
Click Next.
Specify user contour disks
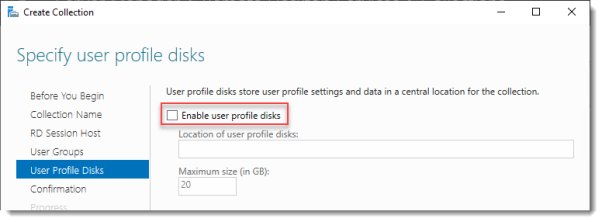
User profile disks are non in focus in this guide. Since I have no file shares configured in this setup, uncheck Enable user profile disks for now.
Click Next.
Confirm selections
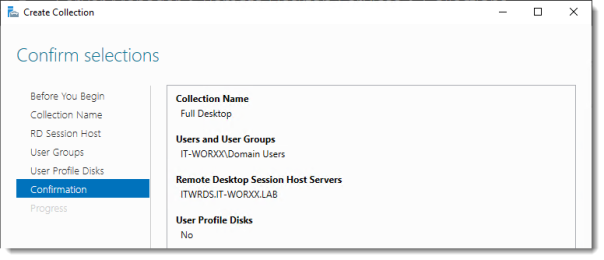
Review the information and click Create.
View Progress
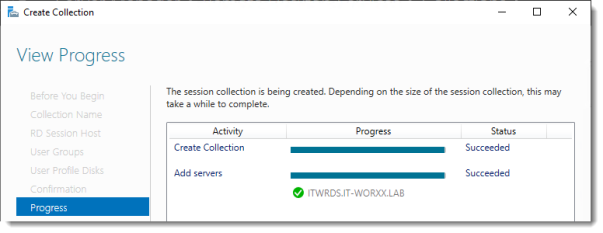
Expect until the collection is created and the server is added to the collection.
Click Close.
Time to examination the setup!
Testing the setup
On a motorcar that has access to your test setup (y'all may have to add the external FQDN to your hosts file if you didn't publish it to the cyberspace) open https://rds.it-worxx.nl/rdweb
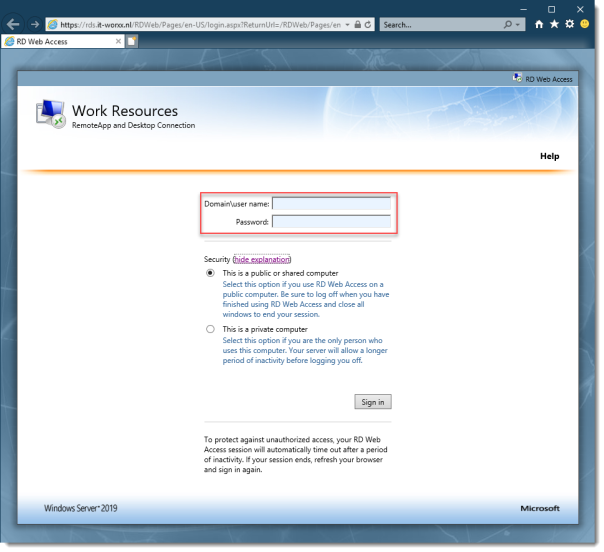
Hey! At least the RD Web Access application works :)
Enter a valid username and password (It-WORXX\username or username@information technology-worxx.lab).
Create a user for this, or simply utilize the domain admin account.
Click Sign in.
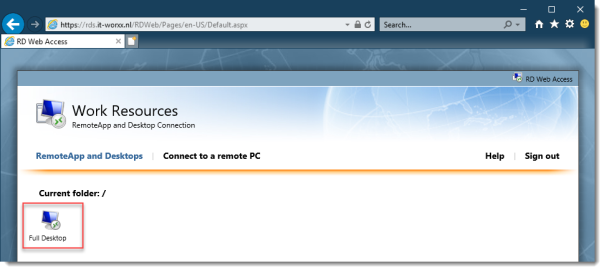
After logging in y'all are presented with the full desktop session collection we created.
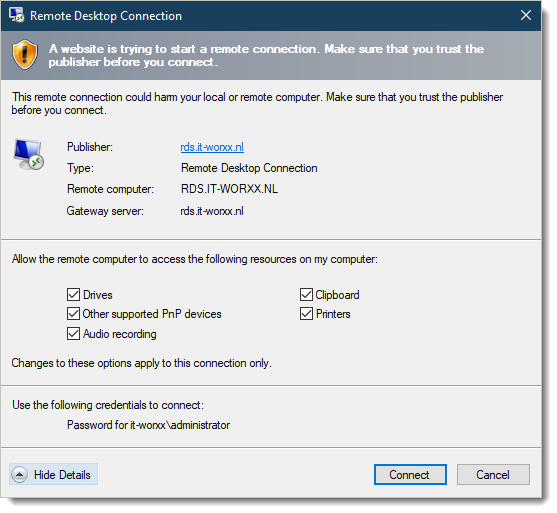
After clicking the Total Desktop icon you get the warning that devices are going to be redirected.
And when you click Connect, you connect :)
Bask.
Arjan
Source: https://msfreaks.wordpress.com/2018/10/06/step-by-step-windows-2019-remote-desktop-services-using-the-gui/
0 Response to "Emote Building Source Remote Remote Could Not Complete the Action Please Try Again Later"
Post a Comment